31 May, 2010
23 May, 2010
Fabulous Frosting
Hello internets!
I got this recipe from the Pioneer Woman - I was making cupcakes this weekend and also really really wanted to try out my new pastry bags, plus HELLO FROSTING. So really, it was the natural response.
Okay, less babbling, more recipe.
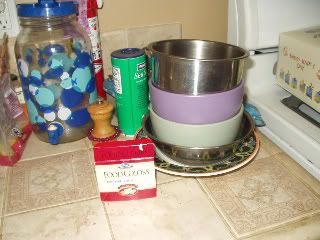
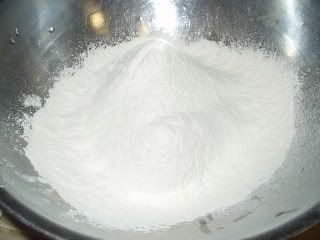
1. Combine 5 tbs flour with 1 cup of milk.
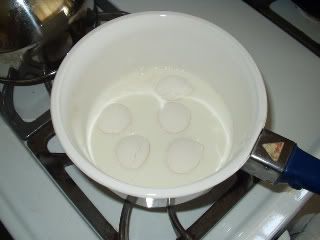
Lookit how cute that is! The flour made little bubbly balls when I tipped it in. D'aww.
No? Not cute? Ah well.
2. Combine the two in a saucepan over medium heat - the Pioneer Woman used a whisk but (confession time!) I have not yet gotten the hang of using a whisk and I ended up burning some of the flour that got stuck to the bottom of the saucepan, so I switched to a spatula.
...Wait a minute. (rereads recipe)
OH.
RIGHT.
Combine them FIRST, then heat. A-durr. ...LOOK, A DISTRACTION!
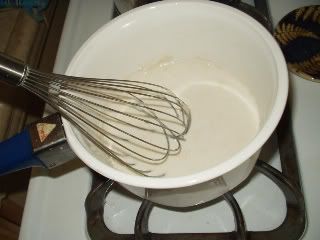
(My first, optimistic photo.)
Ewg, lumpy. I suspect that I did not blend this well enough because there were still some interesting lumps in it when I was done. :/
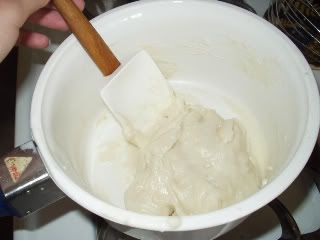
3. Let it cool completely. Why? Hell if I know, I just work here. It'll be SUPER thick, like oatmeal.
You can stick it in the fridge for a bit to cool it down faster.
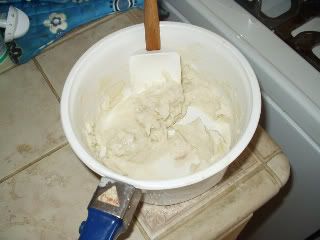
4. Add 1 tsp vanilla.
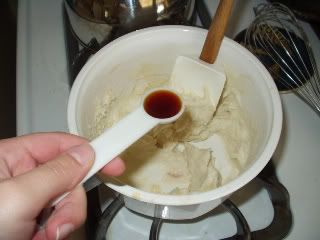
Stir that motherf*cker in.
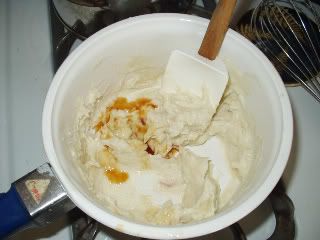
Trust me on this: DO NOT BOTHER SNEAKING A TASTE AT THIS POINT. IT TASTES GROSS.
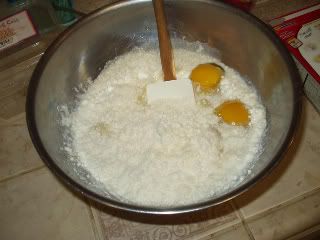
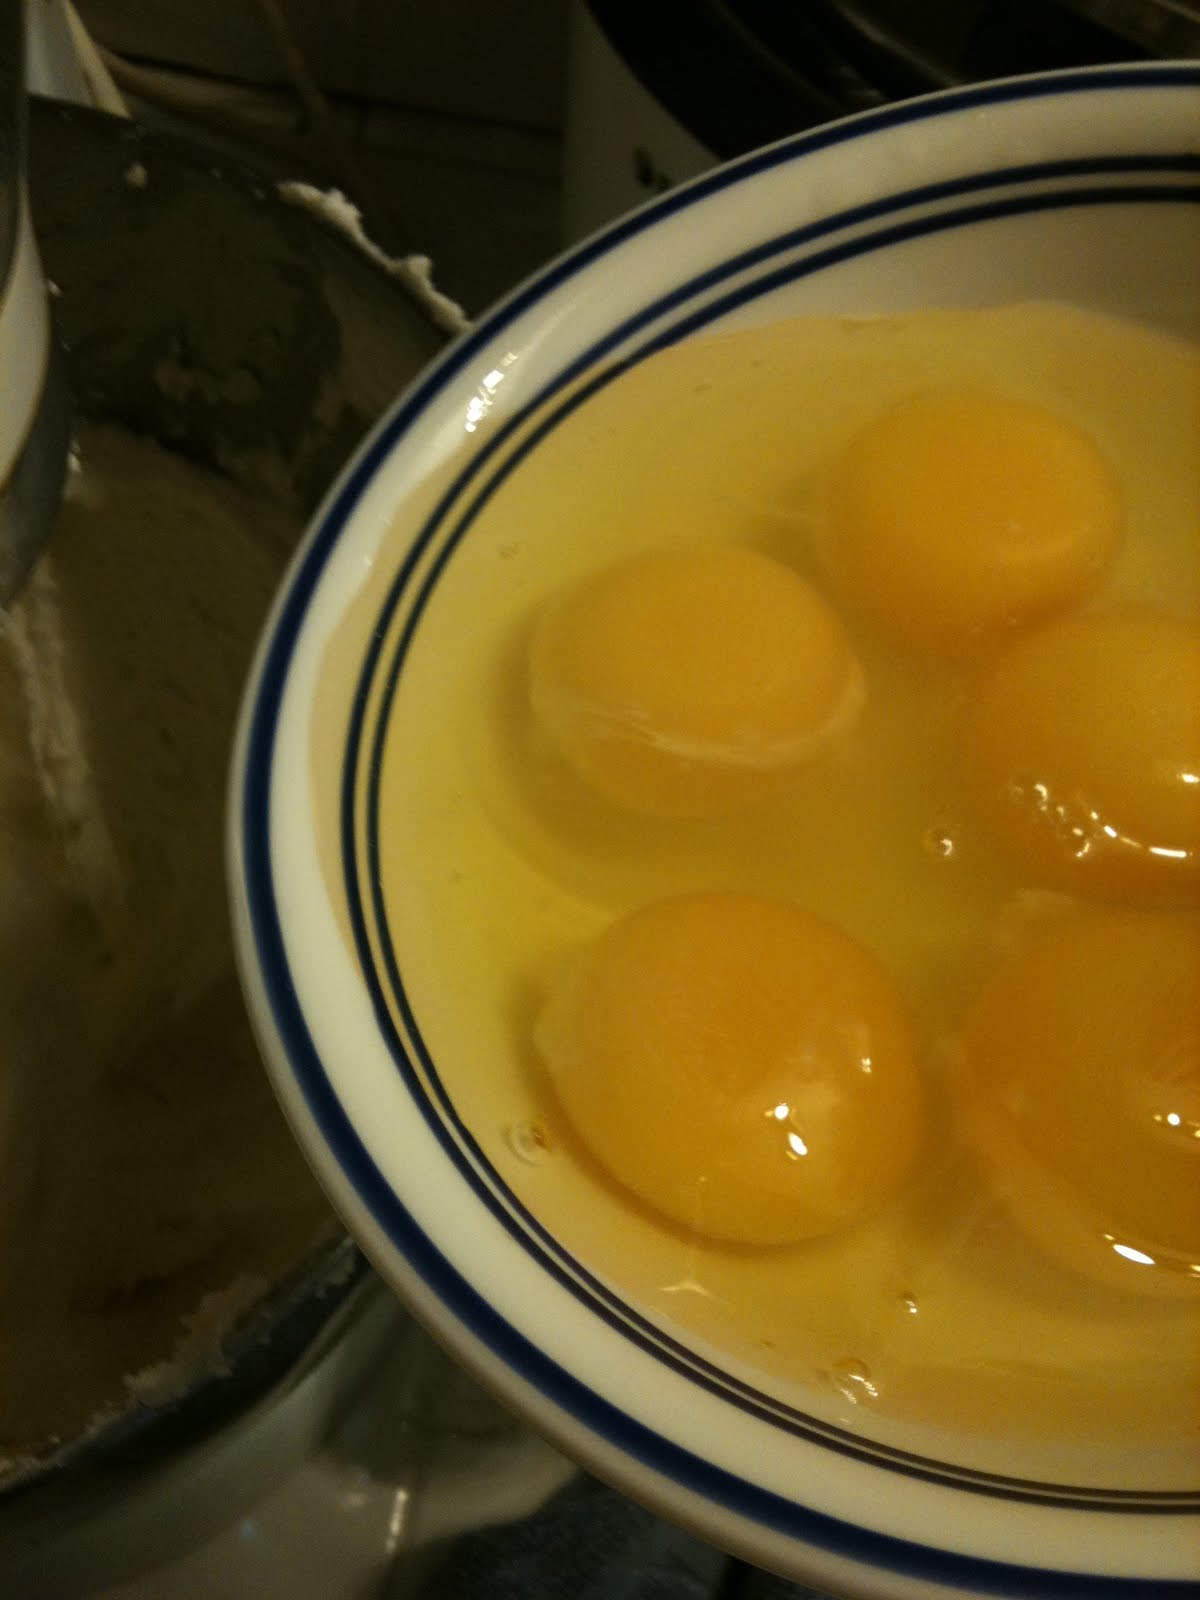
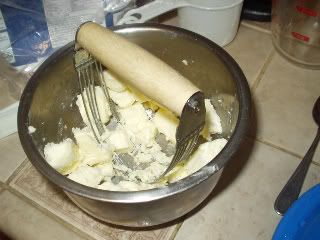
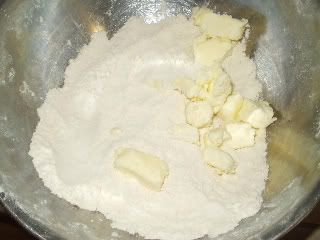
5. Mush up 1 cup sugar with 1 cup butter. The recipe didn't specify powdered sugar or what, but since I am like Einstein (no, really), I figured out that it is, in fact, powdered sugar.
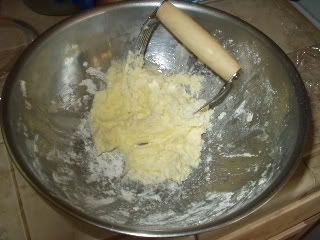
Mush it all together till it's light & fluffy, like whipped cream.
6. Now add theoatmeal flour/milk mush. Whip it on medium high until it has the consistency of frosting. (Man, I dunno... wing it? The recipe says it will have the consistency of whipped cream, but I must have screwed something up pretty bad.)
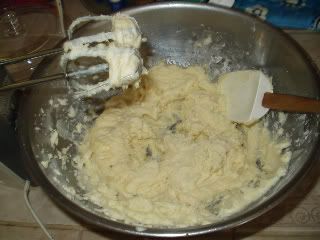
Also, it will look like a science experiment.
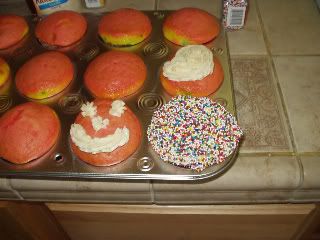
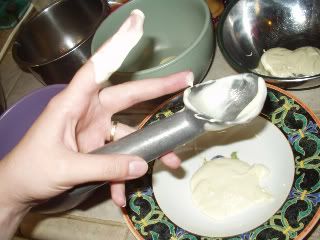
7. Yay! Frosting! Frost your cupcakes/cake/whatever.
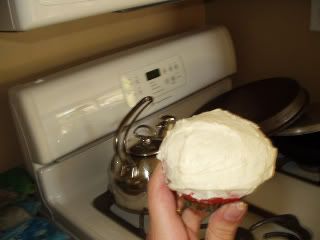
8. Sprinkles optional.
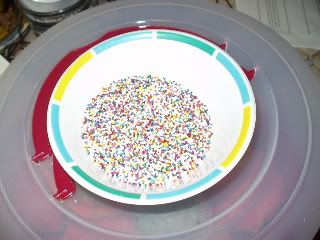
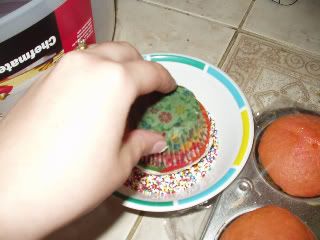
Crunchy.
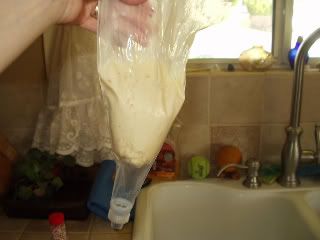
You can also get really excited about using your new pastry bags, like I did, and experiment.
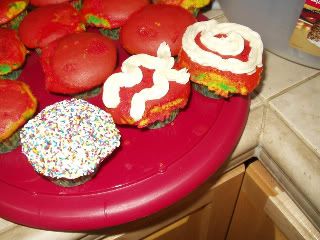
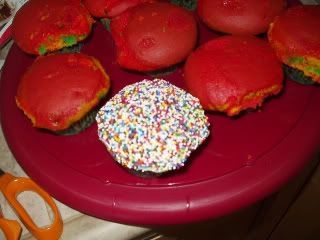
Results: Everyone (except me) loved it. I thought it was so-so, but seriously, HUGE thumbs up from Felder, Chuck*, McK and Eeeeeeeve.
Go, go, gadget professional cook?
<3,
TWC
*Chuck is a professional chef who happens to work with me at my day job.
I got this recipe from the Pioneer Woman - I was making cupcakes this weekend and also really really wanted to try out my new pastry bags, plus HELLO FROSTING. So really, it was the natural response.
Okay, less babbling, more recipe.
1. Combine 5 tbs flour with 1 cup of milk.
Lookit how cute that is! The flour made little bubbly balls when I tipped it in. D'aww.
No? Not cute? Ah well.
2. Combine the two in a saucepan over medium heat - the Pioneer Woman used a whisk but (confession time!) I have not yet gotten the hang of using a whisk and I ended up burning some of the flour that got stuck to the bottom of the saucepan, so I switched to a spatula.
...Wait a minute. (rereads recipe)
OH.
RIGHT.
Combine them FIRST, then heat. A-durr. ...LOOK, A DISTRACTION!
(My first, optimistic photo.)
Ewg, lumpy. I suspect that I did not blend this well enough because there were still some interesting lumps in it when I was done. :/
3. Let it cool completely. Why? Hell if I know, I just work here. It'll be SUPER thick, like oatmeal.
You can stick it in the fridge for a bit to cool it down faster.
4. Add 1 tsp vanilla.
Stir that motherf*cker in.
Trust me on this: DO NOT BOTHER SNEAKING A TASTE AT THIS POINT. IT TASTES GROSS.
5. Mush up 1 cup sugar with 1 cup butter. The recipe didn't specify powdered sugar or what, but since I am like Einstein (no, really), I figured out that it is, in fact, powdered sugar.
Mush it all together till it's light & fluffy, like whipped cream.
6. Now add the
Also, it will look like a science experiment.
7. Yay! Frosting! Frost your cupcakes/cake/whatever.
8. Sprinkles optional.
Crunchy.
You can also get really excited about using your new pastry bags, like I did, and experiment.
Results: Everyone (except me) loved it. I thought it was so-so, but seriously, HUGE thumbs up from Felder, Chuck*, McK and Eeeeeeeve.
Go, go, gadget professional cook?
<3,
TWC
*Chuck is a professional chef who happens to work with me at my day job.
Rainbow Cupcakes!
Part of my job is remembering, announcing and cake-ing people's birthdays at work, so when I realized BossWife's birthday was on Saturday, I asked her what she wanted, expecting her to say "coffee cake!" or "cherry pie!"
Instead, she said "Sherbet!" (Not sherbert? Apparently I've been saying this wrong my entire life. What would I do without you, spellcheck?) Hmm. I can't bake sherbet. Ooh, I know - rainbow sherbet and matching rainbow cupcakes! Squee!
She loved the idea, so I went off to scour the internet for recipes. I found two good ones here and here. I didn't have a whole lot of time, so I modified recipe #2.
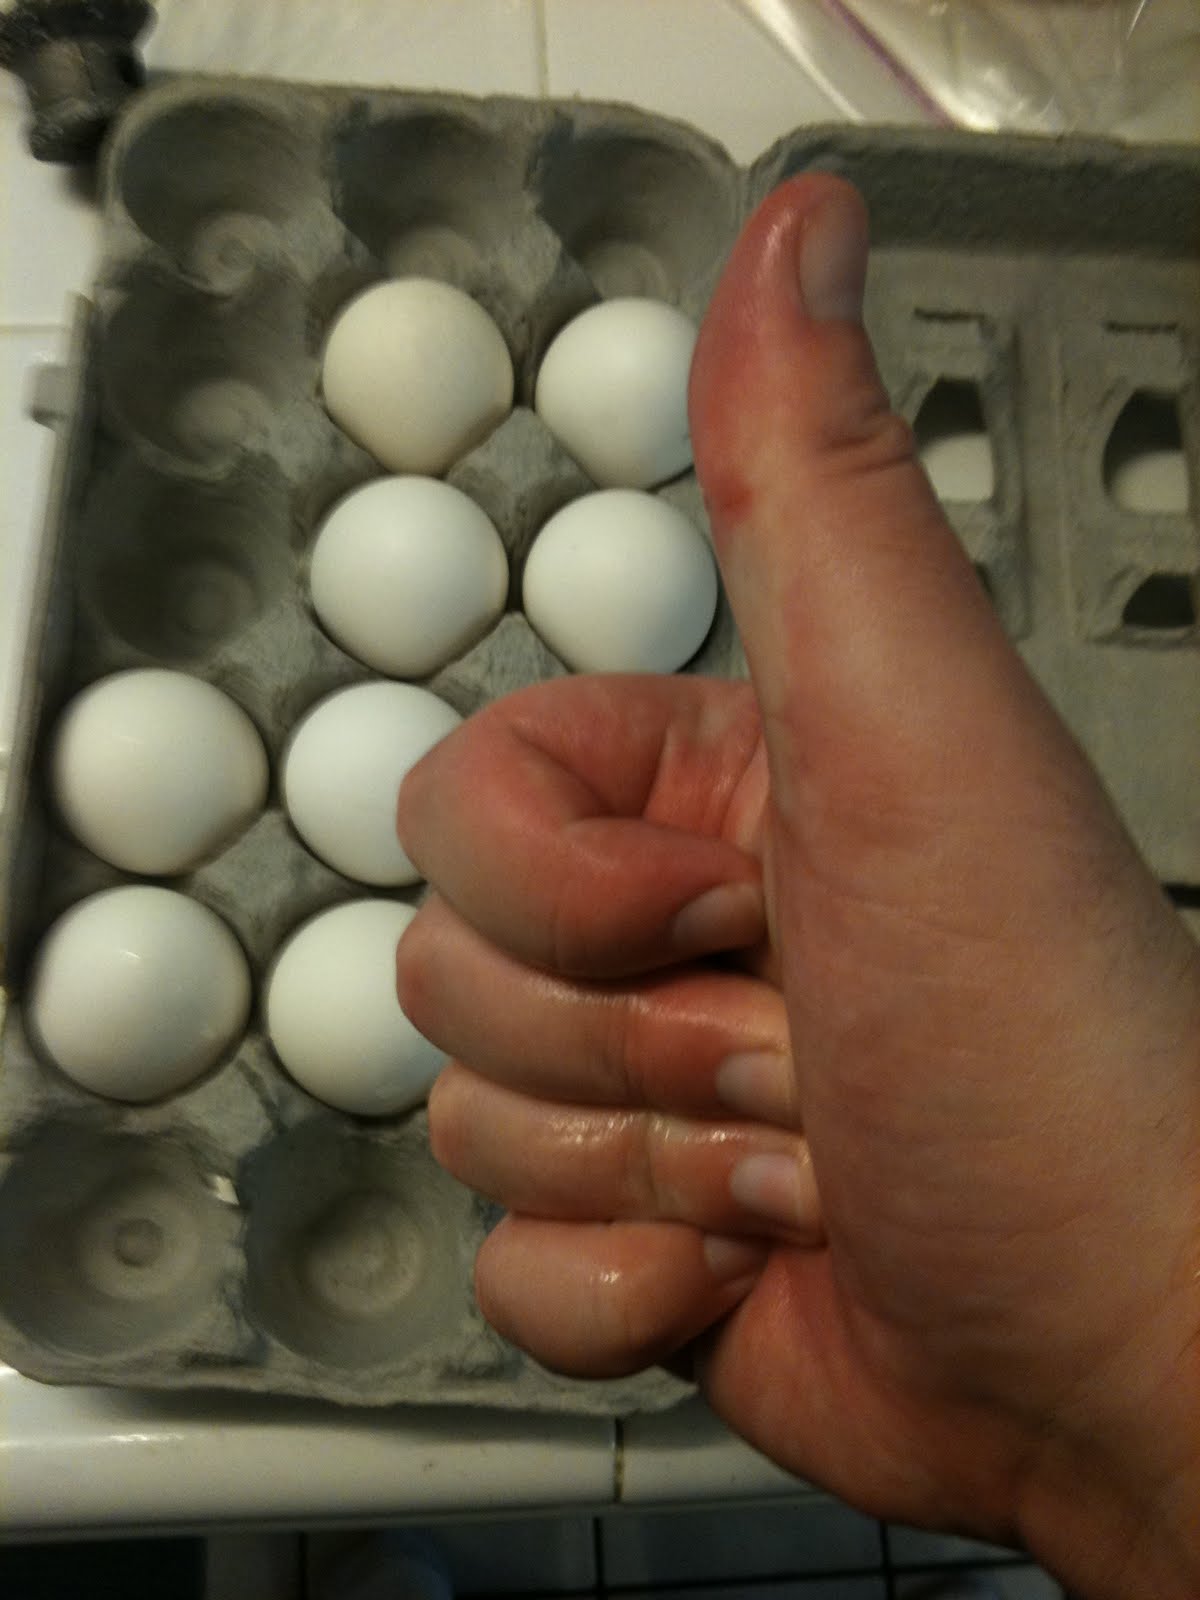
1. Get your ingredients together. You will need: 1 box of white cake mix, 1/3 cup of vegetable oil, 1 1/4 cup of milk, 3 eggs, 1 big bowl, 5 smaller bowls, spoons for mixing, cupcake trays, cupcake cups, lots of food coloring and a partridge in a pear tree.
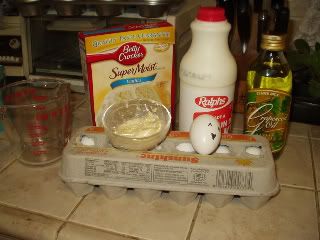
(Not pictured: Partridge, Pear tree.)
2. Mix the cake mix, milk, oil and eggs in the big bowl.
You may use your electric beater if you so desire. Wimp.
3. Dispose of the evidence.
My cousin Vinnie will cut you a deal. /shifty eyes
4. Once it's all good and mixed, divide the batter evenly between the bowls. This is for a strictly red to blue rainbow, so if ya'll want to get fancy with purple or pink, you'll need more bowls. You can use an ice cream scoop to divide the batter.
Um, if you enjoy huge messes and not a lot of work getting done. Yeah, nix the ice cream scoop thing. I ended up using a 1/4 cup measure and it worked out pretty alright.
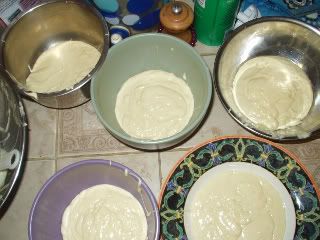
Ain't they purty? Yeah, not really. Tip: Save a bit of batter in the original bowl just in case you run out of one color. Seriously, guys, you will want that backup.
5. Add food coloring.
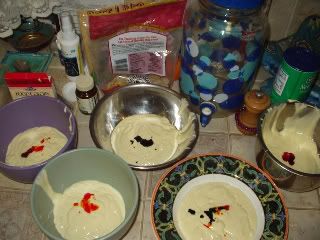
I was going for pastels on this one to match the rainbow sherbet - I did a second batch afterward with stronger colors.
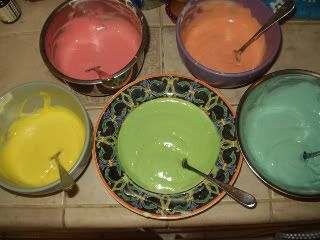
Using liquid food coloring: Red = 5 drops, Orange = 3 drops red, 3 drops yellow, Yellow = 5 drops, Green = 3 drops yellow, 3 drops blue, Blue = 5 drops. The recipe recommended gel food coloring, but I didn't have a chance to pick any up.*
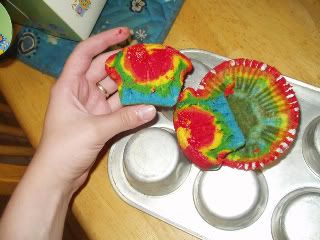
6. Layer the color into cupcake cups.
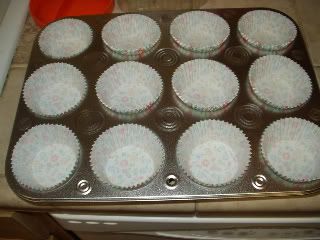

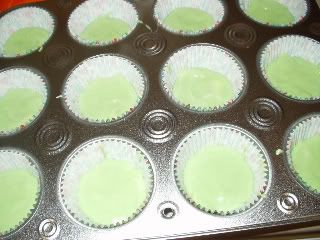
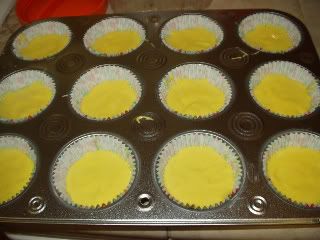
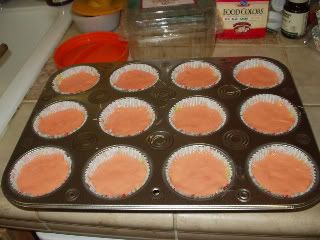
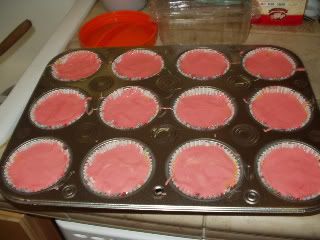
Note: Don't worry if your cupcakes look like Jackson Pollock had a seizure in your kitchen - they'll turn out just fine.
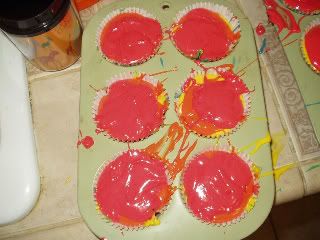
Juuuuuuuuuuuust fiiiiiiine.
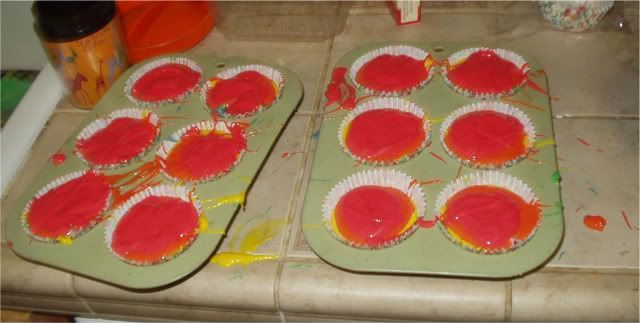
Deeeeep breaths.
(I got kind of fed up with careful spooning and spreading on my second batch - can you tell?)
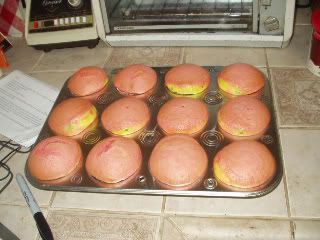
7. Preheat the oven to 325 degrees while you are doing the color. Maybe this should be step 6a? Anyway, bake for about 20 minutes, or until toothpick blah blah blah.
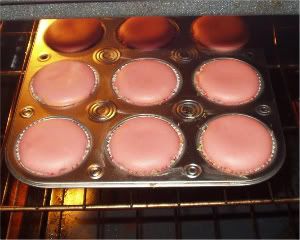
I love how cupcakes look when they're not done baking. Don't you just want to poke these?
If you get bored while they are baking (like I did), you can experiment with food coloring.
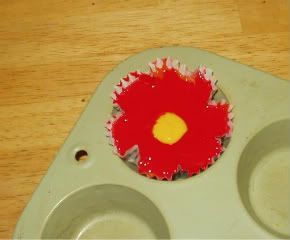
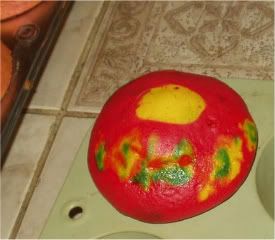
Om nom nom.
8. Let them cool before you frost them, or else the frosting will get all runny and ick.
I also made frosting for these puppies - see Fabulous Frosting for the recipe.
*Read: too lazy to drive to the store.
Love,
TWC
UPDATE: The cupcakes were a success! I had like 4 people come up to me and be all "OMG YOU MADE MY LIFE." Glee! Blee! Squee! ^____^
Instead, she said "Sherbet!" (Not sherbert? Apparently I've been saying this wrong my entire life. What would I do without you, spellcheck?) Hmm. I can't bake sherbet. Ooh, I know - rainbow sherbet and matching rainbow cupcakes! Squee!
She loved the idea, so I went off to scour the internet for recipes. I found two good ones here and here. I didn't have a whole lot of time, so I modified recipe #2.
1. Get your ingredients together. You will need: 1 box of white cake mix, 1/3 cup of vegetable oil, 1 1/4 cup of milk, 3 eggs, 1 big bowl, 5 smaller bowls, spoons for mixing, cupcake trays, cupcake cups, lots of food coloring and a partridge in a pear tree.
(Not pictured: Partridge, Pear tree.)
2. Mix the cake mix, milk, oil and eggs in the big bowl.
You may use your electric beater if you so desire. Wimp.
3. Dispose of the evidence.
My cousin Vinnie will cut you a deal. /shifty eyes
4. Once it's all good and mixed, divide the batter evenly between the bowls. This is for a strictly red to blue rainbow, so if ya'll want to get fancy with purple or pink, you'll need more bowls. You can use an ice cream scoop to divide the batter.
Um, if you enjoy huge messes and not a lot of work getting done. Yeah, nix the ice cream scoop thing. I ended up using a 1/4 cup measure and it worked out pretty alright.
Ain't they purty? Yeah, not really. Tip: Save a bit of batter in the original bowl just in case you run out of one color. Seriously, guys, you will want that backup.
5. Add food coloring.
I was going for pastels on this one to match the rainbow sherbet - I did a second batch afterward with stronger colors.
Using liquid food coloring: Red = 5 drops, Orange = 3 drops red, 3 drops yellow, Yellow = 5 drops, Green = 3 drops yellow, 3 drops blue, Blue = 5 drops. The recipe recommended gel food coloring, but I didn't have a chance to pick any up.*
6. Layer the color into cupcake cups.
Note: Don't worry if your cupcakes look like Jackson Pollock had a seizure in your kitchen - they'll turn out just fine.
Juuuuuuuuuuuust fiiiiiiine.
Deeeeep breaths.
(I got kind of fed up with careful spooning and spreading on my second batch - can you tell?)
7. Preheat the oven to 325 degrees while you are doing the color. Maybe this should be step 6a? Anyway, bake for about 20 minutes, or until toothpick blah blah blah.
I love how cupcakes look when they're not done baking. Don't you just want to poke these?
If you get bored while they are baking (like I did), you can experiment with food coloring.
Om nom nom.
8. Let them cool before you frost them, or else the frosting will get all runny and ick.
I also made frosting for these puppies - see Fabulous Frosting for the recipe.
*Read: too lazy to drive to the store.
Love,
TWC
UPDATE: The cupcakes were a success! I had like 4 people come up to me and be all "OMG YOU MADE MY LIFE." Glee! Blee! Squee! ^____^
10 May, 2010
Oops.
So my birthday was on Saturday (hence the guest post from McK) and I got a bunch of baking stuff - huzzah! One of the things I got was a book of Hershey's recipes.
Last night I attempted to make a chocolate cake from this recipe. Oops. The batter seriously looked like hot chocolate and the damn thing took about 2 hours to bake through.
Never again.
BTW: I'm going out of town this weekend, so no post (probably). Sad face.
<3,
TWC
Last night I attempted to make a chocolate cake from this recipe. Oops. The batter seriously looked like hot chocolate and the damn thing took about 2 hours to bake through.
Never again.
BTW: I'm going out of town this weekend, so no post (probably). Sad face.
<3,
TWC
03 May, 2010
A new Challenger has Appeared!
 And he has stolen the blag!
(It was my birthday yesterday and the mansome McK made me a cake!)
Hello, this is McK, and I made TWC a pound cake for her birfday and she suggested I do a guest blag. So here I am!
Pound cakes are interesting. They are called pound cakes not because they weigh a pound but because they take a pound of each main ingredient. I shall list the ingredients now so you get the idea.
3 cups flour
3 cups sugar
5 eggs (yokes included)
That there is three pounds. Now the rest of the of the ingredients.
2 sticks (1 cup) softened (room temp) butter.
1/3rd cup shortening (fat).
1/2 teaspoon salt
1 teaspoon baking powder (NOT BAKING SODA, DO NOT MISTAKE[won't be horrible explosion or anything, it just won't turn out as good and doesn't hold moisture as well])
1 teaspoon vanilla extract (I just eyeball it, but unless you've made this cake four or five times I'd suggest measuring it for the first go as baking isn't like cooking where you can eyeball everything)
1/2 cup milk.
I should mention that I took a lot of pictures making this cake. I felt pressured as I'd never done this type of thing before and I wanted to do it well. Also the pictures aren't very good 'cause I took them with my iPhone which isn't forgiving of a shaking hand. But before I launch into my story I will give you a little back story:
My kitchen is laughably small. The thought of making a pound cake in there was not a fun one, especially since I've done it before and it is indeed not a fun experience. So with brilliance I grabbed my laundry, headed over to my mom's and begged the use of her kitchen (and washing machine). Her only fee was that I bake TWO cakes, one for m'dad and m'bro (she's dieting).
 So, now enjoying a much larger and better furnished kitchen, I grabbed the old recipe book that is probably older than me. It's so aged and beat up that if it was a leather bound book it'd look like the Necronomicon, except for holding the spells to the zombie apocalypse it would hold the spells for never-ending deliciousness. This is the same cookbook that holds the secret of the Buttermilk Brownies.
I had a hard time reading it because I have a hard time reading all handwriting but thankfully (and irritatingly) Mom was there to coach me along and several times I had to shoo her away and say "My cake! No--Nono, no, no more help! Go watch Gene Simmons!"
 I had a slight "Oh crap" moment when I thought I didn't have enough eggs to make two cakes, but I found some nestled away in the east wing of my mom's refrigerator (it's deceptively large). That is water on my hand, by the way, not slime or some other best left unmentioned fluid.
And now onto the actual cake makingness!

 Get your two sticks of room temp butter and dump them into your mixer (I was lucky enough to use my mom's mixer but if you don't happen to have a super chef for a mom one of the hand mixers should do well--it's how I did it in my pitikitchen) with your shortening. You can start mixing it then or wait until you dump in the sugar, it doesn't really matter. (As you can see by the giant glass measuring cup, my mom has the COOLEST stuff to cook with)
You do this for 3-5 minutes until everything is nice and creamy. That's what we're doing at this point, I forgot to mention: Creaming the butter. Or the eggs. We're creaming something. Don't look at me.
 Anyway, when it looks like this (left) it's time to add the eggs! One at a time and don't add the next until the last one is nice and mixed in there. Keep the beater at a slow pace whenever adding something to the mix. You do this because if it's at high speed it creates a geyser of liquid/flour/sugar/blood(should your finger get caught in there) and it makes a mess.
 Now while the butter is creaming, if you want to multitask (I did on the second cake and the prep goes waaaaay faster) drop your flour, salt and baking powder in a sifter and sift it into a bowl. Then scowl at it. Trust me, the anxiety it feels from the scowl will make it taste that much better. (You cannot tell from the picture, but I am scowling the shit out of that flour).
 At this point you should have your eggs and sugar and butter and shortening and vanilla all creamed together into a nice almost-batter. Now you take your half-cup of milk and while the mixer is mixing you pour in the milk a little bit at a time. A leeetle beet heeer, a leeeeeetle beet theere.
After that's well and mixed in there grab your flour mix and add that in there too! I'd advise a slow and steady approach with the mixer running low, otherwise you get flour in your eyes and it blows. Like a Thai hooker. In your eyes. Don't look at me.
 And after THAT'S all mixed in you grab your bunt pan! I only know how to make it in a bunt pan and I dunno how different pans will affect the cooking process, so if you want another pan you can go right ahead and experiment. Let me mention, however, that this batter does not rise very much. In the bunt pan it rises maybe an inch to an inch and a half, if that.
Spray your pan with some non-stick spray (momma uses Baker's Choice), then grab your batter and glop it in there reasonably level (mine looked like a mountain range, the batter is thick).
Oh, I prolly shoulda mentioned this before, but preheat your oven to 350 degrees.
Stick that bad boy in there for an hour.

Stick a toothpick in it to see if it's done. If it comes out clean, it is done. If part of the cake collapses or the stick comes out with stuff on it, not done.
 Mmmmm. Doneness.
 And here's the final product! Remember, I made two cakes, and this is the one my family has probably already destroyed. I would never offer the first slice of a birfday cake to any but the birfday person (in this case, birfday girl).
TWC devoured her piece like she had Ebola and the cake was the cure.
Took me about 3 hours to make two cakes but the second one about 30 minutes once I knew what I was doing.
-McK
01 May, 2010
Pimp My Pie
In my last post, I had given up on the deliciousness that is a well-made pie. However, the Mother rode to the rescue at the last minute (about 9:30 pm). Apparently, one can substitute unsalted butter for lard!
[And there was much rejoicing.]
So, after reluctantly putting Buffy on pause (well, maybe not so reluctant - Angel was getting emo all over the place), I ventured out into the kitchen.
Pie Crust:
You need to make this the night before because it is supposed to sit in the fridge for like 12 hours. And THEN when you finally make the pie, it has to sit out until it reaches room temperature! This is one of those things like making the bed. (You're just going to sleep in it again tomorrow...)
Uh, anyway, making the crust. This recipe will make 2 9-inch pie crusts (one for top and one for bottom), or you can cut the recipe in half and just have the lower crust.
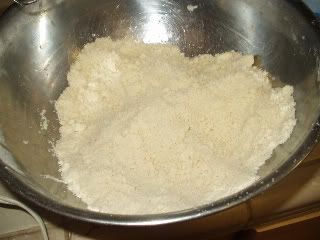
1. Sift together 2 cups flour & 1 tsp salt. (Note: The Joy of Cooking LOVES to make you sift things. It's like a fetish. A sifting fetish. Er... LOOK, A PICTURE!)
2. Measure and combine 2/3 cup "chilled leaf lard or shortening" but unsalted butter totally worked, so no worries, and 2 tbsp chilled butter. Be ready for a hella workout and OMG I have no idea how this is actually supposed to be done. I ended up cutting the butter into 1/2" lumps and sort of shaking them around in a bowl and then trying to use the butter/potato masher and failing and then sort of mooshing them and... you get the idea. It worked well enough I guess.
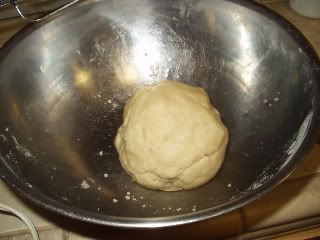
3. Take half of the butter-mix and combine it with the flour mixture using a pastry blender, or your fingertips. I used both. It says if you use your fingertips, go light on it, but that really didn't work. And the blender just rattled the butter around like chunks of icy, well, butter. So I mooshed it around and squished it and squeezed it and blah blah blah, it was fun. You wanna do this until the mix has the consistency of cornmeal. Whatever that means.
(The picture is in between steps 3 & 4. I forgot to take a picture of step 3, oops.)
4. Mix the rest of the butter in. You want a weird consistency where there are pea-sized lumps all up in yo dough.
5. Sprinkle with 4 tablespoons water and blend into the dough. You can used a fork to mix it, or you can go all hands-on like me. (No pictures, sadly, because I don't have an extra hand with which to hold ze camera.) Moosh, moosh, sqoosh. Whee!
6. When you can gather the dough together into a ball and it isn't a bunch of crumbly bits anymore, you're done. (If the dough is hella, HELLA dry, add a little more water to hold it together. You want it a little dry though, otherwise it's sticky.)
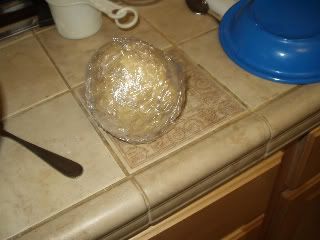
7. Wrap in plastic and store in fridge overnight.
THE NEXT DAY...
Go and buy some vanilla ice cream. Do it. Now. I'll wait.
Got it? We cool now? Good.
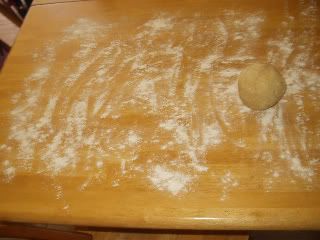
1. Get a 9" pie pan and a rolling pin and a large flat surface. Now take the dough out of the fridge, let it start warming up. Sprinkle flour over the rolling pin and the surface, so that your dough doesn't stick to the table like a gecko. Butter the pie pan. (Not to make it non-stick. but because apparently this will help brown the crust.)
2. Oh yeah, preheat the oven to 450 at some point. You don't have to do it now, I'm just putting it out there as a suggestion.
2a. You may want to get a helper for this next part. I shanghai'ed The Brother with promises of pie.

(This is an old picture of The Brother. He no longer sports a "classy" mullet, thank god, so I felt it perfectly safe to let him touch my food.)
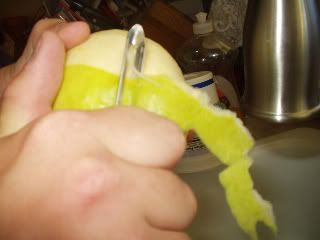
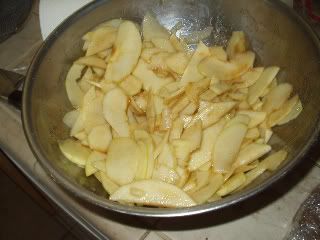
3. While you're waiting for the dough to warm up (this takes FOR-EVER), core, peel and thinly slice 5-6 cups of Granny Smith apples. Apparently they retain their flavor better than sweet apples. (Source: The Mother.)

The Brother: THIS! IS! SPARTA! [viciously cores apple]
The Brother: It puts the lotion on its skin or else it gets the hose again...
TWC: [hides sharp objects]
TWC: [hums theme from Psycho]
The Brother: [piercing shriek]
4. While the apples were beingkilled mangled prepared, we also zested and juiced a lemon. Why? Well, to keep apples from going all brown and oxidized, put them in lemon juice. Also, the recipe says we need 1/2 tsp of lemon zest.
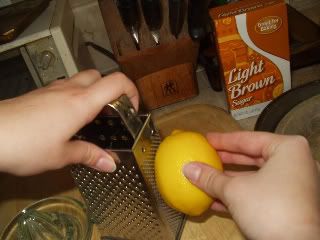
That's right, I zested the everlovingSHIT ZEST out of that lemon. So much, in fact, that it kind of broke. Oh well, I needed lemon juice anyway.
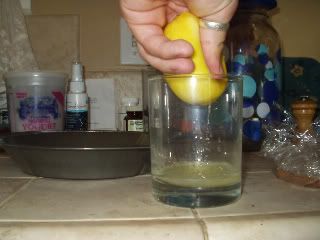
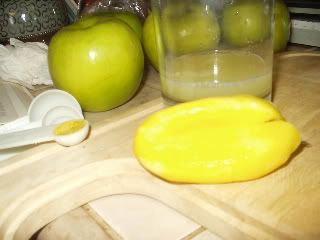
Poor deflated lemon.
5. As you go, take the apple slices and put 'em in a measuring cup with the lemon juice.
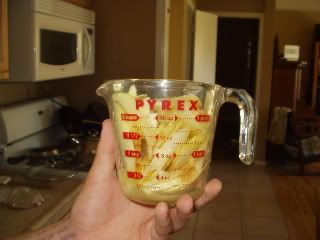
Shake em around a bit and then pour the lemon juice back out into a cup. Try to get as much as you can out, it will want to stay in the apples.
6. Okay, so Step 4 takes a while (A while <>crap dear I only used 1 tsp well we'll see how it goes. What do we use cornstarch for, anyway??) and optionally, 1/2 tsp cinnamon & 1/8 tsp nutmeg. If the apples are super sweet, only use 1/2 cup sugar. If they are super juicy, use an extra 1/2 tbsp corn starch.
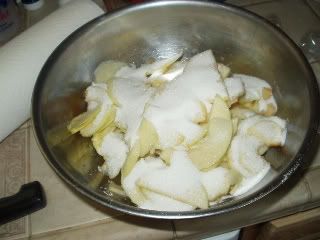
Yes this is only the sugar but I added the other stuff too I swearrr.
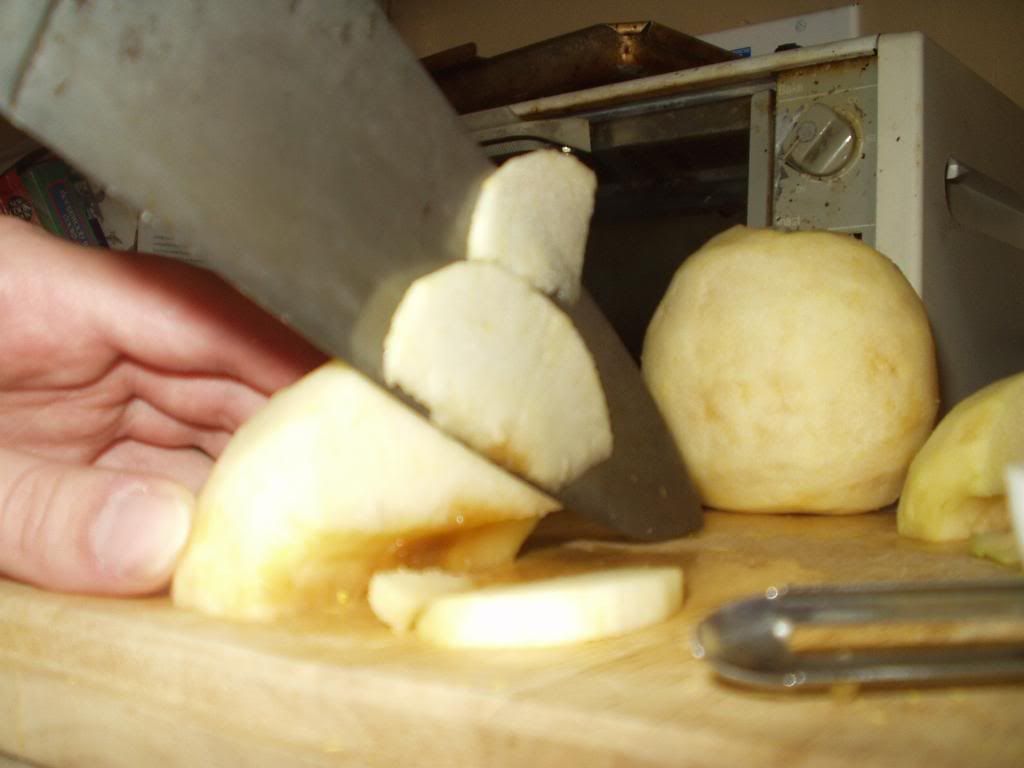
7. Put on some good rock-out music, if you haven't already. I personally chose this song. Mix your apple-stuff like there's no tomorrow.
It is permissible at this point to sample an apple slice. Yum yum yum yum.
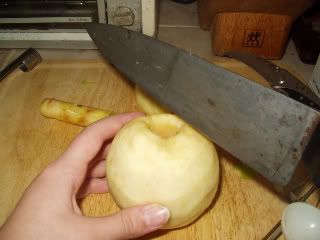
8. Roll out your pie dough. The technique on this is really important, cause if you do it wrong your pie is DOOMED. Doomed like a fat kid in a cannibal tribe. We're talking some hardcore WMD-style panic in the streets, people. So, obvs, you wanna do it right.
9. First, cut your dough in half.
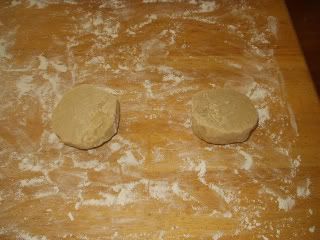
Good! *pat pat*
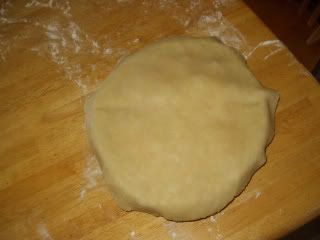
10. Take one half and roll it out. Roll from the middle outwards, not back & forth but one way at a time, alternating strokes.
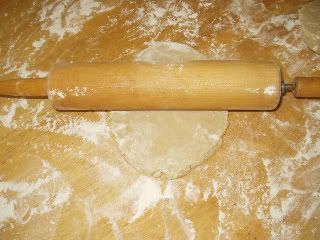
(Think Konami Code.)
11. You want your dough to be roughly roundish and 1/8" thick at the most. Roll it a little bigger than you think you need.
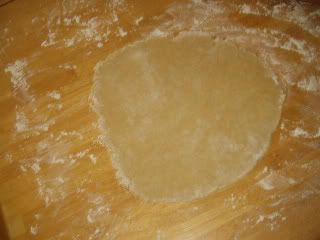
Lookin' good! [Winks, thumbs up.]
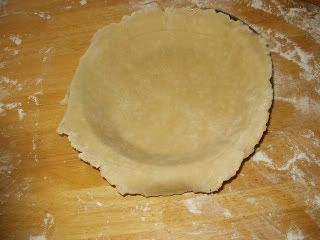
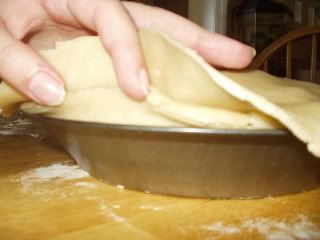
12. Fold it in half and put it in the pan. Now unfold it, pat it down a bit and voila! (Say it phoenetically. VOILA. Like doily but -a instead of -y. Heh.)
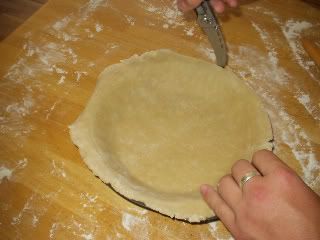
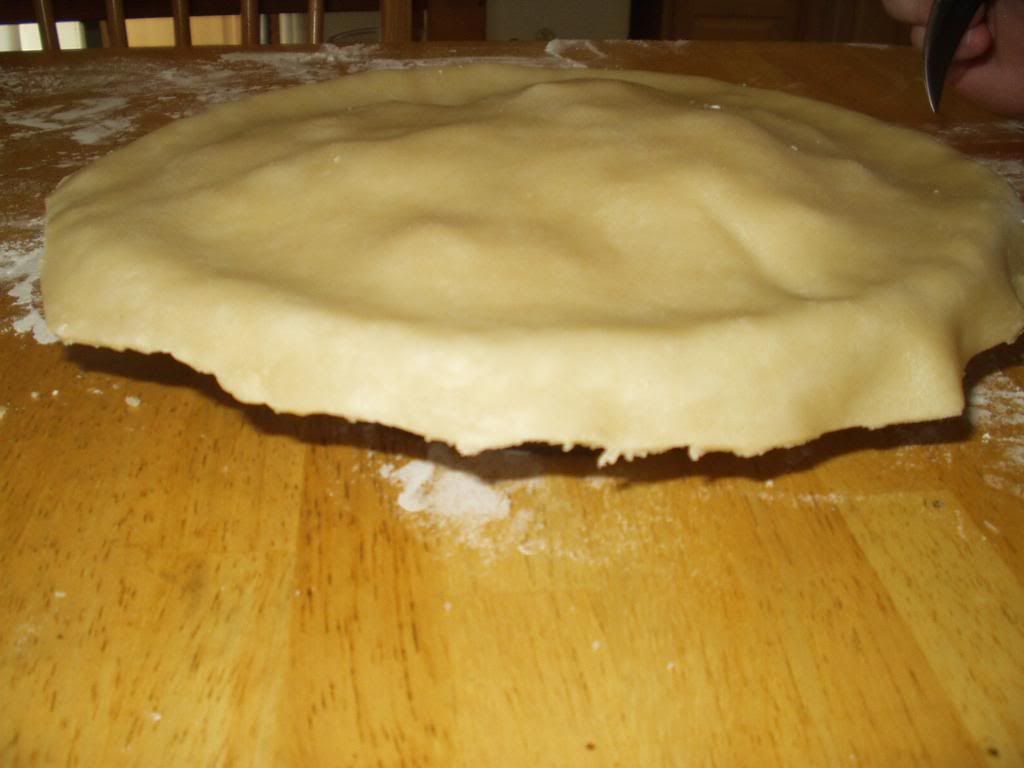
13. Trim the excess crust, leaving about 1-2" extra around the edge to compensate for shrinkage. You can use scissors or a knife for this.
TWC: ...I kind of meant cooking knife, not stabbing knife.
The Brother: [categorically ignores me]
14. You trimmed too much.
15. Panic.
16. Chill the eff out. Your pie is not ruined. I promise. Use some of the cut off dough to fortify your borders.

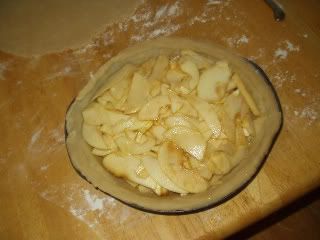
17. Layer the sliced apples in the pie. (Get 1 1/2 tbsp of butter and put little butter chunks in between each layer of apples.)
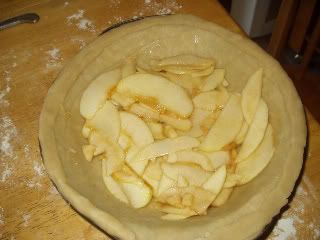
18. Fill that baby up! [makes beeping noises like a cement mixer backing up]
19. Roll out the top crust just like the bottom one and put it on.
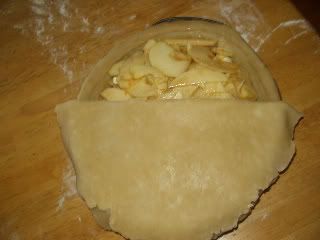
[So. Cute. Looks like babeh apples getting tucked in for the night.]
20. Profit.
21. Trim the top crust so there's a bit hanging off.
You're going to tuck this under the edge of the bottom crust.
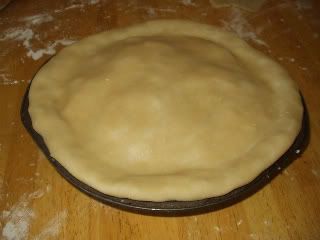
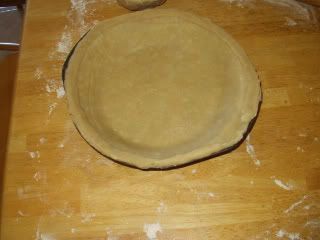
Good lord, it actually looks like a pie. Feel free to revel in the glory for a minute or two.
22. Cut some air holes. You can also decorate the edge with a fork or whatever you want. Oh and some people put cinnamon sugar on the top crust, or brush milk on with a pastry brush, but I didn't read that part of the recipe until just now so, uh... there you go.
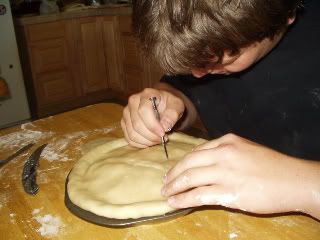
The Brother diligently cut the air-holes while I washed the dishes. [cough]
23. Stick pie in oven. Put a cookie sheet or something on a rack under it to catch any drips.
24. After 10 minutes, turn the temp down to 350 & bake for 35-45 min.
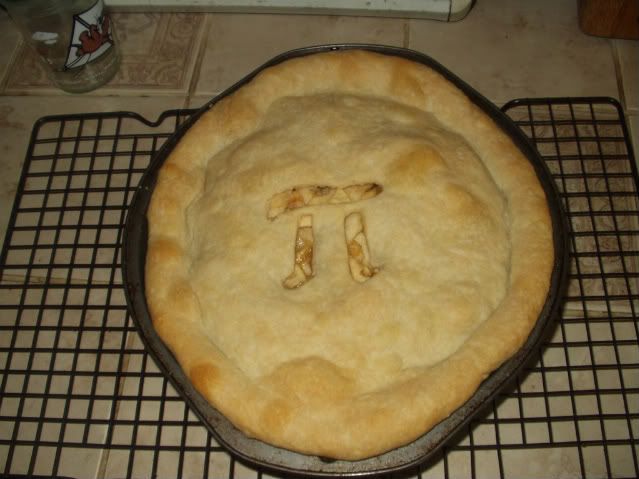
25. Remove pie from oven, DO NOT FORGET HEAT PADS.
26. Let cool. (Or not, I guess.)
26. DEVOUR WITH ICE CREAM.
<3,
TWC
[And there was much rejoicing.]
So, after reluctantly putting Buffy on pause (well, maybe not so reluctant - Angel was getting emo all over the place), I ventured out into the kitchen.
Pie Crust:
You need to make this the night before because it is supposed to sit in the fridge for like 12 hours. And THEN when you finally make the pie, it has to sit out until it reaches room temperature! This is one of those things like making the bed. (You're just going to sleep in it again tomorrow...)
Uh, anyway, making the crust. This recipe will make 2 9-inch pie crusts (one for top and one for bottom), or you can cut the recipe in half and just have the lower crust.
1. Sift together 2 cups flour & 1 tsp salt. (Note: The Joy of Cooking LOVES to make you sift things. It's like a fetish. A sifting fetish. Er... LOOK, A PICTURE!)
2. Measure and combine 2/3 cup "chilled leaf lard or shortening" but unsalted butter totally worked, so no worries, and 2 tbsp chilled butter. Be ready for a hella workout and OMG I have no idea how this is actually supposed to be done. I ended up cutting the butter into 1/2" lumps and sort of shaking them around in a bowl and then trying to use the butter/potato masher and failing and then sort of mooshing them and... you get the idea. It worked well enough I guess.
3. Take half of the butter-mix and combine it with the flour mixture using a pastry blender, or your fingertips. I used both. It says if you use your fingertips, go light on it, but that really didn't work. And the blender just rattled the butter around like chunks of icy, well, butter. So I mooshed it around and squished it and squeezed it and blah blah blah, it was fun. You wanna do this until the mix has the consistency of cornmeal. Whatever that means.
(The picture is in between steps 3 & 4. I forgot to take a picture of step 3, oops.)
4. Mix the rest of the butter in. You want a weird consistency where there are pea-sized lumps all up in yo dough.
5. Sprinkle with 4 tablespoons water and blend into the dough. You can used a fork to mix it, or you can go all hands-on like me. (No pictures, sadly, because I don't have an extra hand with which to hold ze camera.) Moosh, moosh, sqoosh. Whee!
6. When you can gather the dough together into a ball and it isn't a bunch of crumbly bits anymore, you're done. (If the dough is hella, HELLA dry, add a little more water to hold it together. You want it a little dry though, otherwise it's sticky.)
7. Wrap in plastic and store in fridge overnight.
THE NEXT DAY...
Go and buy some vanilla ice cream. Do it. Now. I'll wait.
Got it? We cool now? Good.
1. Get a 9" pie pan and a rolling pin and a large flat surface. Now take the dough out of the fridge, let it start warming up. Sprinkle flour over the rolling pin and the surface, so that your dough doesn't stick to the table like a gecko. Butter the pie pan. (Not to make it non-stick. but because apparently this will help brown the crust.)
2. Oh yeah, preheat the oven to 450 at some point. You don't have to do it now, I'm just putting it out there as a suggestion.
2a. You may want to get a helper for this next part. I shanghai'ed The Brother with promises of pie.
(This is an old picture of The Brother. He no longer sports a "classy" mullet, thank god, so I felt it perfectly safe to let him touch my food.)
3. While you're waiting for the dough to warm up (this takes FOR-EVER), core, peel and thinly slice 5-6 cups of Granny Smith apples. Apparently they retain their flavor better than sweet apples. (Source: The Mother.)
The Brother: THIS! IS! SPARTA! [viciously cores apple]
The Brother: It puts the lotion on its skin or else it gets the hose again...
TWC: [hides sharp objects]
TWC: [hums theme from Psycho]
The Brother: [piercing shriek]
4. While the apples were being
That's right, I zested the everloving
Poor deflated lemon.
5. As you go, take the apple slices and put 'em in a measuring cup with the lemon juice.
Shake em around a bit and then pour the lemon juice back out into a cup. Try to get as much as you can out, it will want to stay in the apples.
6. Okay, so Step 4 takes a while (A while <>crap dear I only used 1 tsp well we'll see how it goes. What do we use cornstarch for, anyway??) and optionally, 1/2 tsp cinnamon & 1/8 tsp nutmeg. If the apples are super sweet, only use 1/2 cup sugar. If they are super juicy, use an extra 1/2 tbsp corn starch.
Yes this is only the sugar but I added the other stuff too I swearrr.
7. Put on some good rock-out music, if you haven't already. I personally chose this song. Mix your apple-stuff like there's no tomorrow.
It is permissible at this point to sample an apple slice. Yum yum yum yum.
8. Roll out your pie dough. The technique on this is really important, cause if you do it wrong your pie is DOOMED. Doomed like a fat kid in a cannibal tribe. We're talking some hardcore WMD-style panic in the streets, people. So, obvs, you wanna do it right.
9. First, cut your dough in half.
Good! *pat pat*
10. Take one half and roll it out. Roll from the middle outwards, not back & forth but one way at a time, alternating strokes.
(Think Konami Code.)
11. You want your dough to be roughly roundish and 1/8" thick at the most. Roll it a little bigger than you think you need.
Lookin' good! [Winks, thumbs up.]
12. Fold it in half and put it in the pan. Now unfold it, pat it down a bit and voila! (Say it phoenetically. VOILA. Like doily but -a instead of -y. Heh.)
13. Trim the excess crust, leaving about 1-2" extra around the edge to compensate for shrinkage. You can use scissors or a knife for this.
TWC: ...I kind of meant cooking knife, not stabbing knife.
The Brother: [categorically ignores me]
14. You trimmed too much.
15. Panic.
16. Chill the eff out. Your pie is not ruined. I promise. Use some of the cut off dough to fortify your borders.
17. Layer the sliced apples in the pie. (Get 1 1/2 tbsp of butter and put little butter chunks in between each layer of apples.)
18. Fill that baby up! [makes beeping noises like a cement mixer backing up]
19. Roll out the top crust just like the bottom one and put it on.
[So. Cute. Looks like babeh apples getting tucked in for the night.]
20. Profit.
21. Trim the top crust so there's a bit hanging off.
You're going to tuck this under the edge of the bottom crust.
Good lord, it actually looks like a pie. Feel free to revel in the glory for a minute or two.
22. Cut some air holes. You can also decorate the edge with a fork or whatever you want. Oh and some people put cinnamon sugar on the top crust, or brush milk on with a pastry brush, but I didn't read that part of the recipe until just now so, uh... there you go.
The Brother diligently cut the air-holes while I washed the dishes. [cough]
23. Stick pie in oven. Put a cookie sheet or something on a rack under it to catch any drips.
24. After 10 minutes, turn the temp down to 350 & bake for 35-45 min.
25. Remove pie from oven, DO NOT FORGET HEAT PADS.
26. Let cool. (Or not, I guess.)
26. DEVOUR WITH ICE CREAM.
<3,
TWC
Subscribe to:
Posts (Atom)